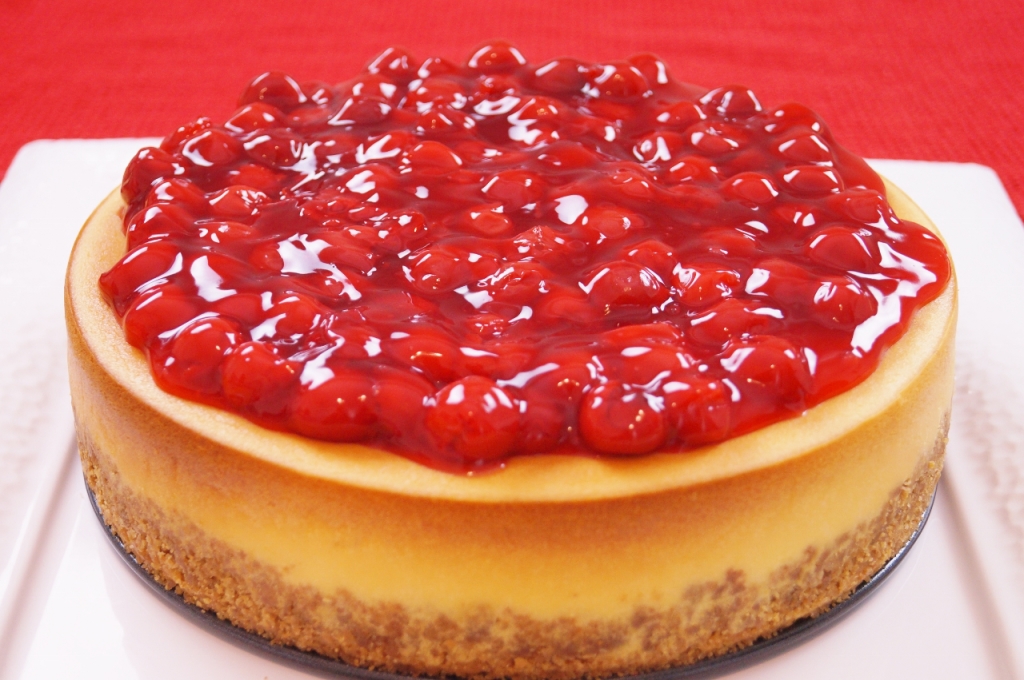
New York Style Cheesecake
Learn How to Make a New York Cheesecake Recipe From Scratch! Step by Step Recipe Tutorial! “New York Style” Cheesecakes are the BEST; rich, and creamy, and dense and delicious! This easy to follow recipe tutorial takes the mystery out of making cheesecake from scratch, at home.
Make a Homemade Cheesecake and impress your friends and family with the best dessert recipe ever!
New York Style Cheesecake
What’s your favorite Cheesecake Recipe? Dessert Recipe? Leave me a comment! Go to this Recipe on YouTube or visit my Facebook Page! Let me know if there’s something you’d like to see. What you’re craving could be my next recipe! Di 😉
Watch The Video! Learn How To Make New York Cheesecake From Scratch! Recipe by: Diane Kometa
*SUBSCRIBE HERE*
Get updated when I release My New Recipes! It’s FREE! Do It!
Don’t Miss An Episode!
New York Cheesecake Recipe
Ingredients:
- Crust:
- 2 cups graham cracker crumbs – about 14 graham crackers
- 1 Tbs. sugar
- pinch ground cinnamon
- pinch salt
- 6 Tbs. melted unsalted butter
- Filling
- Five – 8 ounce packages cream cheese – room temperature – a total of 40 ounces of cream cheese
- 5 eggs – room temperature
- 2 egg yolks – room temperature
- 2 tbs. flour
- 1 1/2 cups sugar
- 2 tsp. pure vanilla extract
- 1/2 tsp. salt
- 1/3 cup sour cream – room temperature
- 1 tsp. finely grated lemon zest
- 1 tsp. finely grated orange zest
Directions:
- Preheat oven to 325 degrees F and position oven rack in center position.
- Thoroughly grease the sides and bottom of a 9 x3 inch spring form pan with butter or non-stick spray. Wrap the bottom of the pan with aluminum foil.
- Make the crust: Combine the graham cracker crumbs, sugar, salt and cinnamon in a bowl. Add the melted butter and mix until moistened. Press the crumb mixture into the bottom and 1 inch up the sides of the pan. Bake in preheated oven for 8 minutes. Remove to a rack to cool for slightly for about 5 minutes and then pop the pan in the fridge to chill, while you make the filling.
- Increase oven temperature to 450 degrees F.
- Filling Notes: 1) The batter must be beaten until satiny smooth for the proper texture, but only on medium to low speed, as not to incorporate too much air into the batter. Mixing time will be longer than a regular cake batter. 2) It is very important to scrape the sides and bottom of bowl and beating attachment during mixing. There is a substantial amount of batter and everything must be thoroughly incorporated for the cake to have a smooth, even texture. Lumps in the batter will not dissolve during cooking.
- Make the filling: Using a stand mixer with the paddle attachment or a hand mixer and a large mixing bowl, beat the cream cheese on medium-low speed until smooth. Scrape bowl and beater attachment as needed. Add the sugar, flour and salt and beat until smooth and creamy. Again, scrape the bowl and beater attachment as you go. Add the eggs and yolks 1 or 2 at a time, beating after each addition. Scrape bowl and beater. With the mixer on low, add the sour cream, zest and vanilla and mix until everything is thoroughly combined. Scrape the beaters, sides and bottom of the bowl well to be sure everything has been mixed through. Beat again on low until batter is smooth and uniform.
- Remove crust from fridge. Slowly pour the filling over the crust and spread evenly with a rubber spatula or the back of a spoon. Run a knife through the batter to release any air bubbles and then smooth the top.
- Bake at 450 degrees F for 12-15 minutes (it will start to brown) and then turn the temperature down to 200 degrees F and bake for another 1 hour and 15 minutes. Do Not Open the Door! Turn the oven off and let the cheesecake rest for another 30 minutes, with the Door Closed. Then open the door and let it rest for 15 minutes longer. The cheesecake should be firm and the top should be lightly browned and smooth. Depending on your oven, the very center may be slightly moist, but that will continue to set as the cake cools. Do Not Insert A Tester Into The Cake!
- Remove the cheesecake from oven and set on a wire rack. Allow the cake to cool slightly and then run a warmed knife or metal spatula around the outside of the pan to loosen the cake, which will help prevent cracking as it cools. Allow cake to cool completely, for at about 2 hours, before refrigerating. Cover with plastic wrap and refrigerate for at least 8 hours before removing from pan.
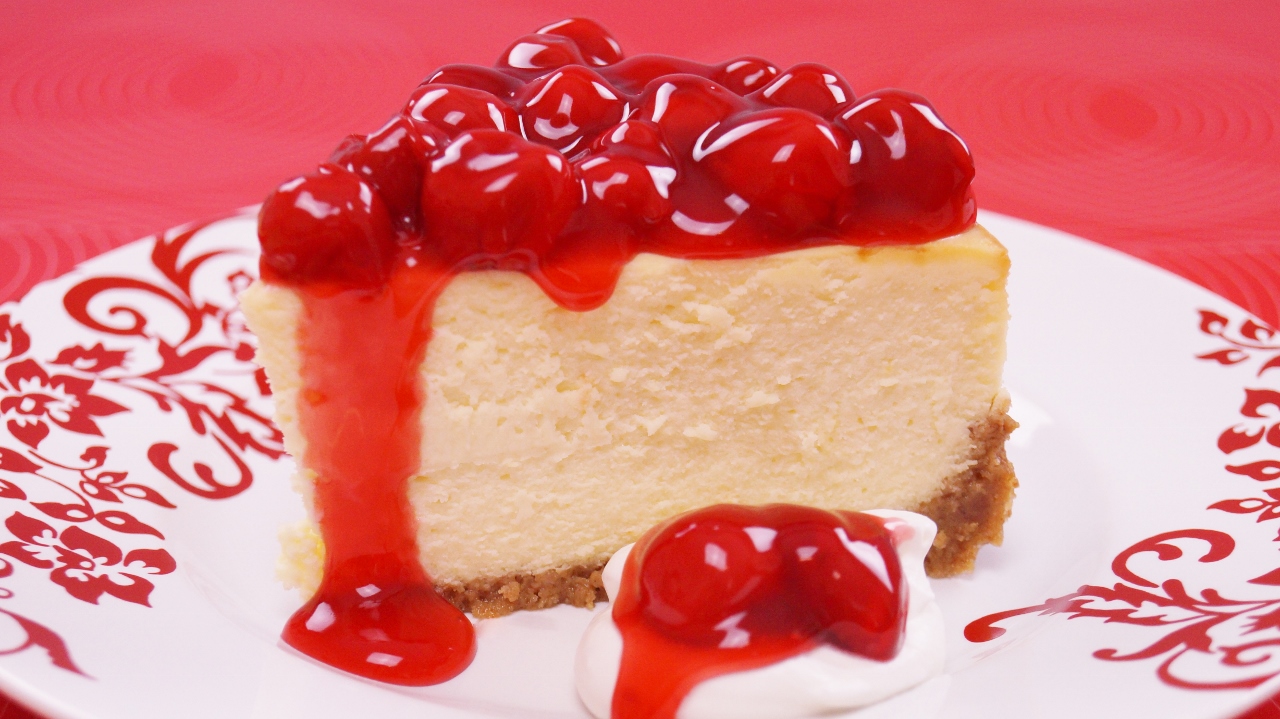
- To remove from pan: Carefully run a warmed knife or metal spatula around the outside edge of the pan again to loosen. Open the pan, and remove spring form. Cheesecake can be served as is or topped with warmed red raspberry or strawberry jelly and fresh berries, cherry pie filling, some fresh sweetened whipped cream or whatever you’d like! Before serving, remove from the fridge and allow cheesecake to sit at room temperature for about 30 minutes. This gives the cake a chance to soften just enough, so it’s smooth, velvety texture can be fully appreciated. Enjoy!
- Notes: Some cracking may be unavoidable, as this is the nature of baking a cheesecake, but a topping will cover any minor imperfections. New York Cheesecake Recipe by: Diane Kometa
Tagged: American, authentic, bake, baked, bakery, bakery style, baking, Basic, best, betty crocker, butter, Cake, cakes, can, carnegie, cheese, cheese cake, Cheesecake, cheesecakes, cherry, Christmas, cinnamon, citrus, Classic, cook, cooked, cooking, cracking, cracks, cream, cream cheese, creamy, Crust, deli, deli style, delicious, demonstration, dense, Dessert, Desserts, di, Diane Kometa, dish, Dishin With Di, Easter, easy, egg yolks, eggs, factory, favorite, filling, flour, Food, foolproof, from scratch, fruit, good, graham cracker crust, graham crackers, granulated, great, homemade, How To Make, instructions, Lemon, lemon zest, Lindy's, making, New Year's, New Year's Eve, new york, New York City, new york deli style, new york style, NY, nyc, Old Fashioned, orange, orange zest, original, pan, perfect, Philadelphia, Pie, pie filling, plain, problems, professional, Recipe, restaurant, rich, sauce, Simple, sour, sour cream, Spring, spring form pan, spring pan, sugar, Thanksgiving, thick, tips, topping, Traditional, tutorial, Valentine's Day, vanilla, video, white, with sour cream, YouTube
